

Mounting tubular tiresLevel of Difficulty: AdvancedTypical Tools and Supplies Needed
|
|
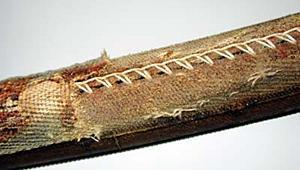
A tubular tire with most of the base tape (visible left) removed to show the stitching that holds together the tire carcass, |
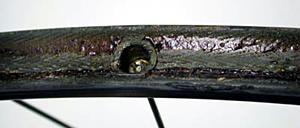
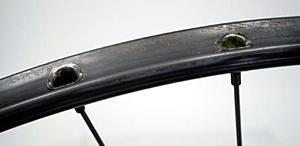
Rims for tubular tires have a concave bed where the tyre is glued into place and lack the hooked sidewalls found in rims intended for clincher tires. |
Tubular tires 101
The tubular tire system, even when mounted properly, is still susceptible to failure during use. Every precaution should be taken when bonding the tubular to the rim. At this time there are no industry standards for tubular mounting.
The basic principles that apply to gluing and adhesive bonding apply to tubular mounting. Generally, there should be enough adhesive to bond the tire and rim but not excessive amounts of glue. Excessive amounts of glue can become especially susceptible to failure from heat. There will be limits on the strength the bond between rim and tire.
|
|
Contact cements tend to soften and loose strength when they are heated. Hard braking during a descent can cause enough rim heat build up to soften tubular glue.
Wet conditions tend to weaken the bond. Never glue a tubular out in rain or when the base surfaces are wet. Use care when washing tubular and avoid scrubbing the rim/tire interface.
The tire is held on to the rim by glue, tension from the cord, and by air pressure. If a tire flats, the grip to the rim is weakened, and the tire is susceptible to coming off the rim.
During use, the wheel and tire are subjected to several different types of stresses. The worst stress for the tubular system is a lateral load or lateral impact. Hitting bumps during a corner, where the wheel comes of the ground and then lands with an impact tends to push the tire sideways. This may cause the tire to come off the rim, either partially or entirely, which may result in a crash of the rider.
Most bicycle tubular glues are variations on contact cements. Tubular cement must hold the tire to the rim, but yet be somewhat flexible and giving when the tire is impacted laterally. Expoy or hard glue would tend to shatter when impacted rather than yield during a shock. Tubular cements tend to use volatile solvents that must bleed or dry out before the bond is fully secure. While the application technique is critical to maximum bonding strength, glue brands will vary in quality and adhesive strength. For more detail on tubular bonding see a technical article by Dr. Colin Howat, see the Kurata Thermodynamics Laboratory
The safety of the rider depends on the best possible gluing procedures. A clean work area is important, as is time and patience. Ideally, it would be best to have three days to bond a tubular to the rim. This would allow for full drying of base coats. It is possible to glue a tire in a shorter amount of time, but it is important to undertand that tubular adhesive requires time for proper curing. The bond strength increases after the tire is initially mounted.
Gluing Procedure- new or bare rim
As with all bonding procedures, clean surfaces are important. Use a clean rag and a solvent that will not leave an oily film, such as acetone or alcohol, to clean the rim surface. An oily surface will tend to reply the adhesive. Allow rim to dry completely before continuing. NOTE: Do not use strong solvent to wipe carbon fiber rims. Wipe with a clean cloth only. If necessary, use soap and water to remove oil and allow drying completely.
The tubular tire can be a tight fit to the rim. It can help to stretch the tire on a dry rim and inflate it to full pressure. Allow wheel to sit overnight. If time is an issue, the tire can be manually stretched by placing it over your back "bandoleer" style. Place a knee in the tire and stretch, using your back.
Inspect base tape. If the base tape is covered with latex, attempt to scrape clean with a sharp edge. If scraping does not appear to remove any glue, do not scrape further. If scraping appears to clean and clear the tape, continue until full width of tape is finished.
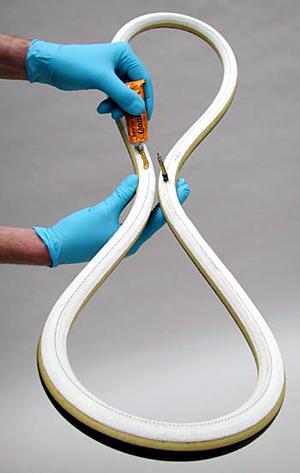 Apply
a single coat of glue to the base tape. Inflate tubular until base tape
rolls outward. Handle the tire by the sidewalls. Pinch tire in the middle
to form a "figure 8". Apply a bead of glue a few centimeters at a time,
and spread evenly across the base tape. Continue until entire base tape
is coated, including the area at valve.
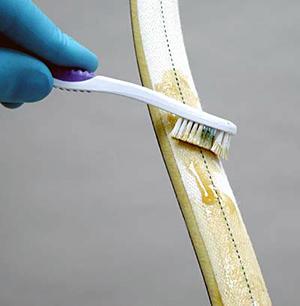 Use
care not to get glue on sidewall of tire. However, if glue does get on
sidewall, do not remove with solvent. Simply allow drying and leave it
alone. Hang tire off ground in a dust free environment allow to dry completely.
A dry tire will be easier to handle when mounted to the rim.
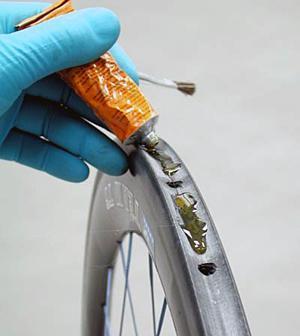 If
rim has no base coat, apply a first coat. Spread an adhesive bead a short
section of rim, then spread evenly the full width of the rim with a clean
brush. Allow this first coat to completely dry, ideally overnight.
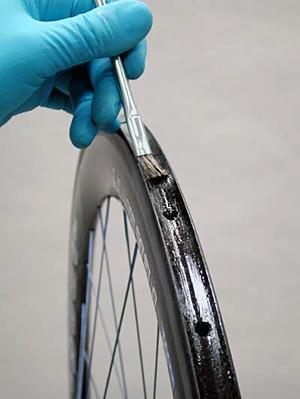 Apply
an additional coat and allow this coat to dry as well. The third and perhaps
final coat will be used to mount the tire while it is tacky, and not completely
dry. If there is a poor fit between tire shape and rim shape, more coats
may be required.
It is important the adhesive be applied fully to the edges of the rim. Most of the holding power will come from the outer edges of the tubular rim.
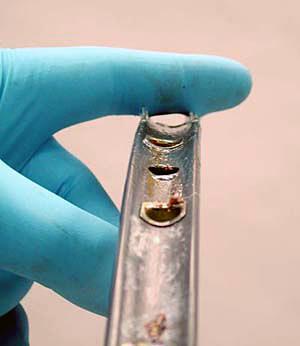 Test
edges for glue.
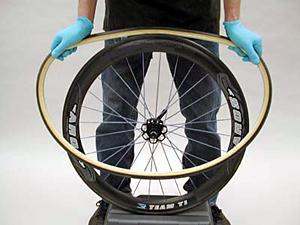 After
applying the final coat the rim, allow to partially dry. This may take
from a few minutes to one half hour, depending upon the glue and atmospheric
conditions. Deflate the tubular until it is soft, but leave enough air
so the tire holds its shape. This will help keep the sidewalls clean during
mounting. Find a clean floor area to work on, such as tile, or even a
toolbox lid. Do not mount on carpet, grass, or any surface that may contaminate
the rim. Place the wheel vertically and place the valve in the valve hole.
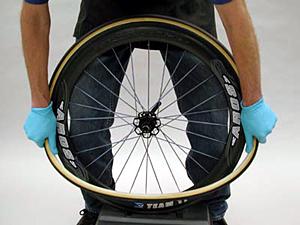 Begin
to pull outward on the tire, holding the tire approximately 12-inches
(30cm) to either side of the valve. Work the tire on a section at a time,
while continuing to maintain pressure on the tire.
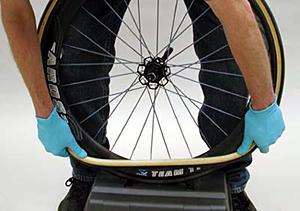 The
last section may be especially tight and difficult to get on the rim.
Use thumb pressure to force tire onto rim.
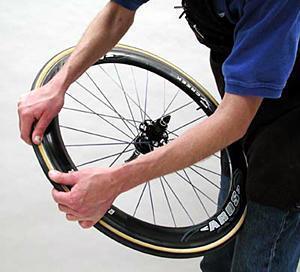 After
the tubular is mounted, IMMEDIATELY begin to true and align the tire on
the rim. Sight the base tape on both sides of the rim. Generally, the
base tape should appear even and centered. Check that the center of the
tire is if fact centered on the rim. Pull and twist the tire as necessary.
It can help to deflate the tire further to align, but re-inflate to check
final alignment.
Checking adhesion
 |
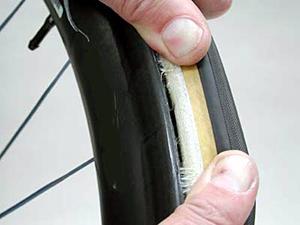 |
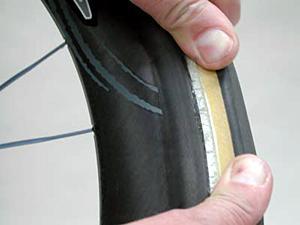
Check proper adhesion at this time. Roll the tire back in several places and inspect the glue at the rim and tire interface. Glue should be apparent at this area. The first image above is adequately glued, but the second image shows lack of glue, called a "starved joint". Remove tire and apply more glue to the rim.
After the tire is aligned, inflate tire fully. High tire pressure will
help press the base tape fully in the radius of the rim. It can also help
to roll the tire along the floor while applying downward pressure.
Clean braking surface of any glue. Use a strong solvent and a rag is the rim is aluminum. For carbon rims, wipe off glue as best possible without solvent.
Lastly, the tire MUST be allowed to fully cure. This will require time for the glue solvent to bleed out. It is recommended that a tire be allowed to cure for 24-hours. Gluing and using a tire in a short amount of time will not allow proper bonding, and can lead to failure, no matter the brand of glue.
Mounting to Used Tubular Rims
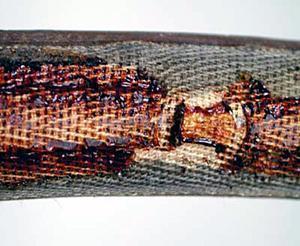
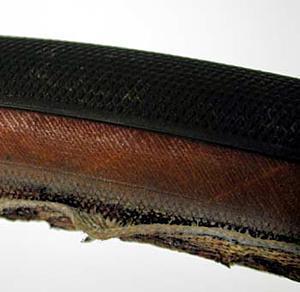
The gluing procedures will vary depending upon of the condition of the used rim. If the rim already has a base coat, it typically can be re-used. The old tire, once removed, will give indications of the previous gluing. In the image below, the base tape shows very minimal contact.
 There
will often be a layer of dirt on the edges of used rims. Use a scraper
and remove this glue and dirt. Remember, it is the edges that do most
of the holding. It may be necessary to build up the previous coat. It
is also possible that the old coat is thick in some area and bare in other.
Apply glue accordingly. If the base coat is very old, or if it is dirty
and contaminated, it should be stripped off. It is possible to use heavy-bodied
paint removers. Use a bio-degradable remover when possible, and follow
stripper directions.
 NOTE:
Do not use paint stripper or other strong solvents on carbon rims. Any
solvent strong enough to cut the old glue will be strong enough to potentially
damage the matrix of the carbon fiber. If there is excessive glue build
up, apply a thin coat glue and then scrape off excess, effectively using
the new glue as a "solvent".
 The base tape of a tubular is adhered to the tire with glue. If the base
tape comes loose from the tire, it is difficult to repair to a "like new"
condition. Use a thin coat of glue on the base tape. Install tire to a
dry rim and inflate fully to push tape to rim.
It is impossible to fully inspect the mounting of a tubular without its removal. This of course is not practical. Roll the tire back away from the rim to inspect the glue at the rim/tire interface. If popping and cracking is heard, it is an indication the bond is old or there was inadequate glue in the bond. The tire would be suspect.
Suggested Park Tools
- PCS-1 or PCS-4 Truing Stand
- PFP-2, or PFP-3 floor pump


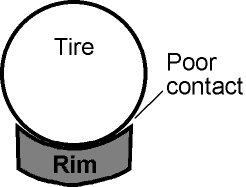 The
tubular tire shape may not be a good match with the radius of a
particular tubular rim. The tubular bond strength comes from the
outer edges of the rim more than the center. If the tire is too
small for the rim, there will not be good contact at the outer edges.
In the cross section image below, there will be poor contact between
tire and rim at the outer edges.