
Cutting and fitting gear and brake housing and cablesLevel of difficulty: StraightforwardTypical tools and supplies needed
About housing and cables
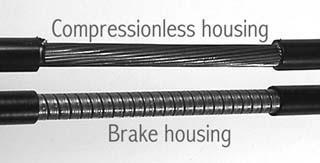
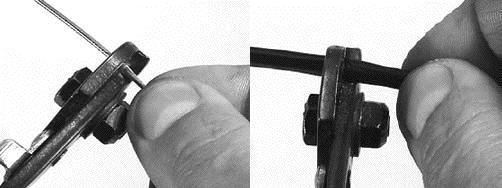
Almost all gear and brake cables on bicycles are of the multi-strand type in which many strands of wire are twisted together. 'Braided' cable, which has the wire strands woven together as in a rope, is now rare, and for the purposes of repair can be treated the same as twisted cable. There are two types of housing: 'compressionless' housing, intended for gear cables, and wound housing, for brake cables. Compresionless housing uses many inner support wires running longitudinally within an inner plastic liner. Compressionless housing is intended for shifting systems only, not braking. The longitudinal strands in this housing act to maintain constant housing length when the housing is curved and so prevent 'ghost' shifts when the handlebars are turned. Despite its name, compresionless housing is actually weaker in compression than wound housing. Brake housing must resist compression when the brake cable is pulled, so compressionless housing must not be used for brake systems. Brake housing is made of a wire wound around a plastic liner. This design resists the compression that occurs in reaction to the brake cable being pulled by the brake lever. Housing ferrules are steel or plastic caps that fit over the end of teh housing and have a hole for the cable to pass. Ferrules should be used with all housings whenever possible. Cable ends should be capped with soft aluminium cable end caps to prevent them fraying. Cable cutters are designed to cut multi-strand wires such as gear and brake cable, brake housing, and compressionless gear housing. The jaws of the cable cutter surround and then sheer the material. Using plain diagonal cutters can simply flatten and smash cables. As with all cutting tools, it is recommended to wear eye protection. Procedure
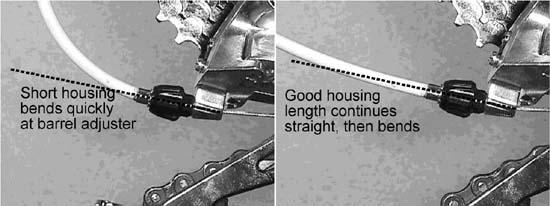
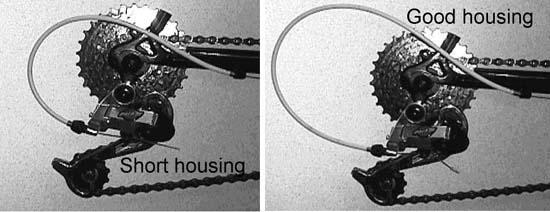
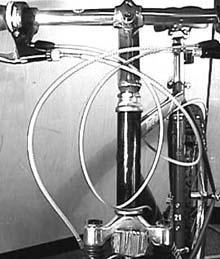
Determining housing lengthBrake and gear housing allows the cable wire to be routed around bends and connects the levers to the frame stops. The less the drag on the cables, the better for the shifting and braking. Too short of housing will cause it to kink and bind, making even more friction. As a rule of thumb, try to size the housing so it is as short as possible but it still enters the stops and barrel adjusters in a straight approach. For the rear derailleur housing, note especially how the housing enters the barrel adjuster.
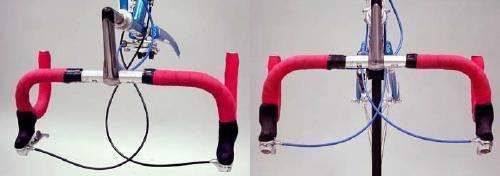
Routing of cable and housingThe routing of housing may affect the length. Typically the front derailleur shift housing is run on the left side of the frame, while the rear derailleur shift housing is run on the right. This may at time cause unnecessary bending in the housing. In some cases, it is possible to "cross over" the housing, running the front shifter to the right side stop, and the rear shifter to the left side stop. It will then be necessary to again cross the cable. Consider this option, but if the cable ends up rubbing the frame, it is not a good idea. There may be some light rubbing between cables, but this would result in less friction than poorly routed housing.
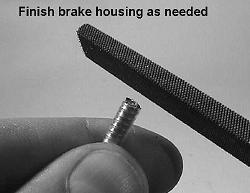
Cutting brake housing
Adjustment of cable cuttersAs a cable cutter wears, it may require readjustment for best cutting results. Grab the handles and wiggle them against the axis of the thread. If there is play between handles, turn locknut counterclockwise to loosen nut, turn bolt head clockwise slightly to tighten adjustment, and retighten locknut. Repeat adjustments as needed until tool cuts cable cleanly. If handles bind, turn locknut counterclockwise to loosen nut, turn bolt head counterclockwise slightly to tighten adjustment, then retighten locking nut. Repeat adjustments as needed until tool cuts cable cleanly. Content for this page courtesy Park Tool. For more on Park's range of tools and workshop supplies, see: Park Tool 's website. Notes
|
||||||||||||||||||||