Recently on Cyclingnews.com |
Tech feature: Pro bike mechanic tricks, June 1, 2005Pro bike prepSweating the details that make a production bike ready for the pro race circuit
Many professional teams now race on production frames from their bike sponsors. But while the bikes are functionally identical to the machines you can buy in the shops, pro mechanics have to tweak a bunch of details to make a frame fully ready for the rigours of life on the road. Shimano mechanic Chris Davidson shows you how Triki Beltran's 2004 bike was prepped for life with US Postal. Amateur racers and enthusiasts alike often ask me what the 'real' differences are between the bikes that they see on the floor at their favorite bike shops and those that that pros ride in competition. The impression that I get is that the cycling public believes -- regardless of what the major manufacturers say about their sponsored athletes/teams riding stock production frames with no modifications -- that the pros get special equipment that is not available for sale to the public. While this is true in a minority of cases, in the modern age of 'win on it Sunday, and sell it on Monday' most manufacturers want to see sporting success take place on bikes that are available to their customers. This serves as a validation of their technology and manufacturing process.
However, while the bikes that these pros ride start out as stock frames, there are modifications that make them more suitable for the rigours of life on the road. Let's take a closer look, then, at a single example of a high-tech stock frame from one of the major bike manufacturers and that is available in your local bike shop but that has been prepped for pro team use. In this case I am going to expose the real differences in this frame that make it 'Pro Race' ready. The frame that we are looking at belongs to Discovery Channel rider Manuel Beltran and was used last year for the second half of the 2004 season, including the Vuelta where 'Triki' wore the leader's jersey for multiple days. It started life in Waterloo, Wisconsin as a stock Trek Madone with 110gsm OCLV carbon as the frame material and a fork made of the same carbon bonded to an aluminum steerer tube. The geometry is stock Trek 58cm, the same size that Lance Armstrong also rides. The bike got the USPS sponsor's paint scheme before it left the factory, but it easily could have received the 2004 Madone 5.9 paint and ended up with Dura-Ace parts group on the floor of your local Trek Dealer. No other differences just yet.
Next stop for a frame such as this is the Service Course for the team.
Here is where the modifications start to prepare this frame to carry the
top riders to victories in UCI races.
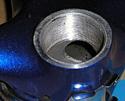
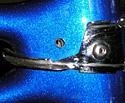
Next up for this frame was drilling a small hole under the bottom bracket shell just behind the cable guide. Trek uses an aluminum bottom bracket shell inside this carbon frame, and because the BB is the low point on the frame, water will collect in the frame down here from rain, bike washing, etc. While this might be a greater problem for an older metallic frame, especially a steel one which could rust, this carbon frame sees no long term damage from exposure to water. However, the bearings in the bottom bracket assembly are susceptible to water if it resides in the frame for any period of time. Hence this small drain hole assures this frame will only carry water in the bottle cages, not inside the frame.
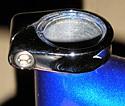
Next point on this frame that is mechanic/pro race friendly is the seat collar. The key point here is that it is replaceable on the frame. It may seem like a simple thing, but with as much mileage as this frame will spend on trucks and in airports, having this piece be replaceable is absolutely essential. Murphy's Law is always in effect with bike mechanics, and if there is a part that can be overtightened/stripped/rounded out, it will be at some point. Key feature here is that the seat collar comes off and came be quickly be replaced if compromised. You can bet that the team mechanics have a drawer full of these replacement collars on the team truck. How is your frame configured? You might think of getting an extra one of these parts if you travel/fly with your bike to races. The next points of this frame that got lots of mechanic time and attention
before it first became a complete bike are the dropouts, both front and
rear. As a mechanic, if the next time that you see this frame is when
you rider is standing on the side of the road waiting for you to jump
out of the team car to change a wheel, then the wheel change must go
lighting-fast and problem-free. This requires paint-free dropouts that
have no sharp edges or irregularities that might impede the wheel change.
This work is typically accomplished with a flat hand file and some careful
attention. When I am prepping a set of dropouts I usually get a pair of
race wheels and run a few trials of fast wheel changes while the frame
is still in the workstand. In these trials I am looking for incident-free
entry and exit of the wheels from the dropouts, even if I am a little
hurried and sloppy with my wheel changing technique. It will never truly
simulate changing a wheel in a ditch on a descent in the rain when your
rider, the GC leader, flats out of the break, but it is better that you
learn of any problems with dropouts now during frame-prep, rather than
in a race.
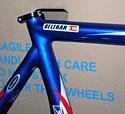
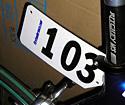
The next area of modification is cosmetic, but with a distinct purpose: advertising. The frame carries a couple of extra decals, in this case that of the tire sponsor Hutchinson. These decals may seem like minor details, but to the companies involved, their placement and appearance in the press is very important. Expectations are high for co-sponsors and suppliers for the large pro teams; they fully expect that any coverage that the bike gets will include their company's logo. Last summer I made a small error when working for the T-Mobile women's team, I goofed on a decal placement. Sure enough our team director got a call within 24 hours of a photo being posted online, and my mistake was met with a serious tone from the team sponsor. Big business in these small decals. Another non-production modification added to this frame is the number plate mount. This piece is specific to a race bike, frame numbers are important in picking finish order in huge pack finishes. This add-on comes courtesy of the manufacturer, a custom bracket that is bonded to the frame. There are other ways of mounting a number plate on a race bike, but this under-the-top-tube location is out of the way for both mechanic and rider. It also tends to protect the number plate when the bike has to ride on top of the team car. The last modification is a staple on pro bikes: the name decal. True to the large diversity on ProTour teams, there are many different nationalities represented on any one squad. This decal for Manuel Beltran includes his home country's flag for reference. It is surprising how often a weary mechanic uses this decal for reference after a long night of washing and tuning bikes; the decals are more than just decoration. Make it large and make it distinct, then the wrong bike ends up in/on the wrong vehicle less of the time.
These decals are not exclusive to pro riders; you can get them for your bike. The Postal/Discovery decals came from www.vcgraphix.com. A simple way to upgrade your own race steed, so why not? Trek rightfully claims that Triki Beltran's race bike is a stock frame. However there are a range of modifications that take this frame from 'stock' to 'Pro Race' ready. Some are easy enough to do to your own racing frame, or to get done by a well-equipped bike shop - facing the surfaces, dropout prep, name decals - while and others come only courtesy of the factory, such as a number plate mount. Finding some of these modifications sometimes takes a trained eye, they grow out of the needs of the task at hand: the highest level of bike racing. The beauty of the preparation for pro level racing lies in the (somewhat hidden) details. Enjoy. |
